The Hallowed Halls of the Moonlit Gild

In the depths of the ancient Forest of Eldergrove lies an enigmatic structure known as the Hallowed Halls, a relic of a time when the Fey danced in moonlight and whispers filled the air. It is said that deep within these dilapidated chambers, a sacred artifact known as the Silver Revenant Pendant pulses with otherworldly power. Legend tells of the pendant's ability to grant visions of the past, revealing truths hidden by time—but at great cost. Here, adventurers must navigate a maze of spectral foes and forgotten traps, led by the ghostly guardian, Lady Anathiel, a powerful seer who vanished centuries ago. Will you uncover the secrets of the Hollowed Halls, or will you be lost to the shadows that dwell within?
Room Descriptions
Room 1: The Gloaming Entryway
Description: As the characters step into the entryway, they notice the thick air filled with a subtle spark of silver luminescence. Creaking vines drape from the cracked ceiling, and dust dances in the soft moonlight filtering through gaping holes.
Monsters/Traps: A pair of Moonlight Phantoms lurk here, translucent entities that manifest illusions of lost souls.
Treasures: An ornate silver lantern that, when activated, reveals hidden glyphs along the walls.
Room 2: The Weeping Statues
Description: This chamber is lined with stone statues weeping a viscous, shimmering liquid. Each statue depicts a face twisted in sorrow, their eyes reflecting the moonlight’s beauty.
Monsters/Traps: One statue is Animated and attacks intruders with stone fists. As a trap, a magical effect upon the floor can cause sorrowful echoes that charm nearby characters.
Treasures: 3 pieces of Moonstone worth 50 gold crowns each; a scroll detailing the legend of Lady Anathiel.
Room 3: The Shattered Runes
Description: The floor is littered with shattered tiles covered in ancient runes. A faint echo of whispers can be heard, seeming to communicate with any cleric present.
Monsters/Traps: A Countess of Whispers, a hostile spirit, seeks to share knowledge with deceit, lashing out at those who misunderstand her intentions.
Treasures: A potion labeled “Spectral Elixir” that grants resistance to necrotic damage for one hour and a torn page of Fey poetry.
Room 4: Celestial Greenery
Description: Vines with luminescent flowers twine around rotting roots, emitting a soothing fragrance reminiscent of twilight. The air hums with enchantment.
Monsters/Traps: Will-o’-the-Wisps hover about, stealing light and warmth from characters who stray too close.
Treasures: A Cursed Seed, worth an outrageous fortune with unknown qualities with hints of unearthly help should its nature be unraveled.
Room 5: Ethereal Chronicles Chamber
Description: Desks and bookshelves piled high with dusty tomes reach into the dim corners. The air is charged with a numinous energy, ideal for study or commune.
Monsters/Traps: A Binding Wisp ensnares characters, attempting to prevent knowledge from being uncovered.
Treasures: An ancient tome on Fey history containing lost spells or insights into Lady Anathiel, potentially leading to quests beyond this dungeon.
Room 6: The Gilded Embrace
Description: Gilded tapestries hang on every wall, depicting lunar feasts among fey kind. Moonlight streams through scintillating window shapes, casting patterns on the floor.
Monsters/Traps: A Slumbering Enchantment trap can force characters into unnatural sleep upon gazing too long at the patterns.
Treasures: Piles of trinkets including jeweled bracelets worth 200 gold crowns; enchantments provide limited use of spells like Dancing Lights.
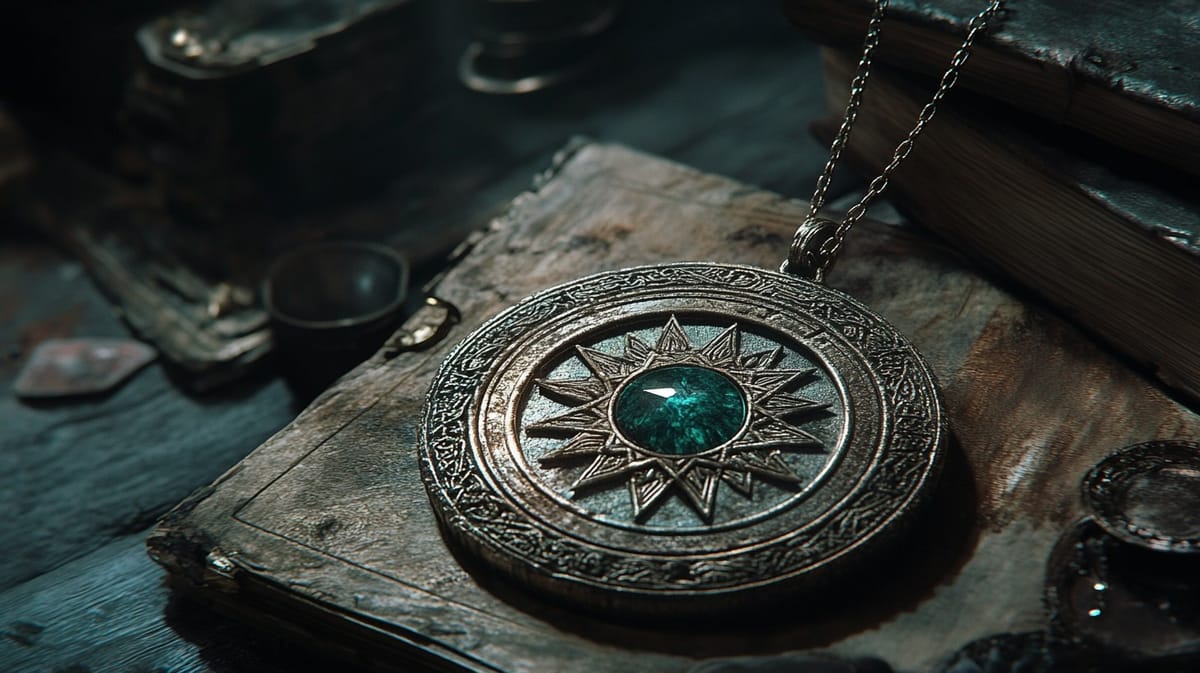
Room 7: The Argent Altar
Description: A monumental altar radiates a pale glow and is encrusted with silver vines and delicate flowers carved from the same material. The air here feels heavy with reverence.
Monsters/Traps: Guardians of this altar, Moonborne Sentinels, are incorporeal yet formidable, attacking trespassers.
Treasures: The Silver Revenant Pendant lies at the altar’s center, waiting to be claimed, and an ancient respectively labeled seal which reveals lore.
Room 8: Glimmering Lake
Description: This expansive chamber is home to a shimmering lake reflecting the ceiling stars. An undeniable sense of peace pervades the area, disrupted only by heartbeats.
Monsters/Traps: A Bargain Siren, lured from the depths by the pendant's power, offers tempting deals but at the risk of ensnaring characters' souls.
Treasures: Vials of glistening lake water that allow for enhanced perception in darkness for 1 hour.
Room 9: Ancestral Hall of Echoes
Description: This long corridor is resonant with the echoes of countless voices, a chorus of warnings that overlap in an enveloping embrace. Reflection pools line the hall sides.
Monsters/Traps: Echo Shades use voices of the past to sow discord amongst party members, igniting mistrust.
Treasures: A reflective shard that grants insight into traps and secrets in the Halls ahead, usable thrice.
Room 10: The Veil Chamber
Description: A shimmering, ethereal curtain ripples with energy, suggesting a crossing between realms. Figures can faintly be seen struggling against the veil.
Monsters/Traps: Sorrowsheets attempt to ensnare characters with chains of despair, forcing characters to confront their fears.
Treasures: A Minor relic of fate that allows a single re-roll of any failed saving throw within the coming encounters.
Conclusion
To enhance the dungeon experience for your players, consider implementing environmental storytelling by adding remnants of characters who fell to the depths of despair or hope. The presence of Lady Anathiel can serve as both a guide and an antagonist, challenging players to choose between uncovering the past or preserving their future. Allow for options in handling the Siren to encourage creative solutions. Remember, player choices should feel impactful in this world of haunting beauty and dark tragedy, ensuring an unforgettable adventure.